DIY Ornaments: Silver Leaf Glass Ball Ornaments and 10 Ways to Style Them
Old glass and plastic ball ornaments turn up in every box of holiday decor from a thrift store or an estate sale. They are often in colors nobody wants anymore or the finish is beginning to wear. Silver leaf fixes that. You brush on adhesive, press on a sheet of leaf, and seal it. These DIY ornaments look spectacular with silver leaf.
This is an article about DIY ornaments made by silver leafing glass ball ornaments, and ways to style them for winter and weddings.
This post may contain affiliate links, which means I’ll receive a commission if you purchase through my link, at no extra cost to you. I am an Amazon associate. Please read full disclosure here.

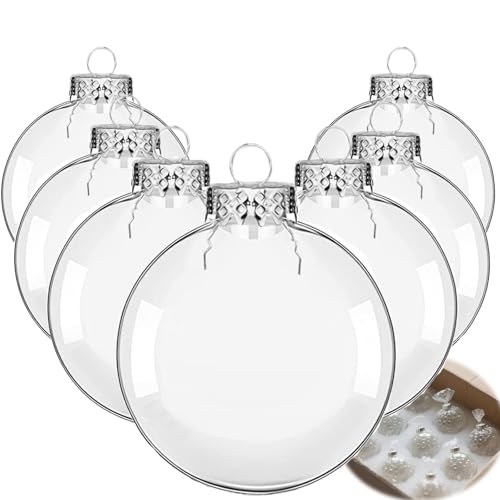
These DIY ornaments are the silver version of our gold leaf ornaments. Opaque color glass balls get silver leaf on the outside. Clear glass balls can take the leaf on the outside too, or on the inside, where the glass protects it for a different look. And if you can’t find vintage ball ornaments you like, or you want a lot of one look, you can also buy new ones on Amazon.
You can hang them on the Christmas tree, but they don’t have to come down with it. In a dough bowl on the coffee table or on a silver tray, they can stay out through January and February, and with the greenery swapped for flowers they go on a wedding table. The how-to comes first, red and green ornaments and then clear ones, then ten ways to style them.
For more silver to put around them, see our silver decor ideas. Bleached pinecones go in the same bowl or under a cloche with them.
Jump Ahead
What You Need for Silver Leaf Ornaments

Order the silver leaf kit here. Or purchase separately: Silver leaf· Mod Podge · Clear Mod Podge spray sealer · From our Etsy shop: silver trays
- Vintage or new colored glass ball ornaments for the outside method. Old boxes of vintage glass balls take leaf too.
- Vintage or new clear glass ball ornaments for the inside method (or use the outside method). Glass or plastic both work.
- A silver leaf kit with imitation silver leaf, water-based gilding adhesive (sizing), varnish and brushes, or silver leaf and Mod Podge
- Mod Podge in gloss for the inside of the clear ornaments (skip it if you only use the outside method)
- Clear Mod Podge sealer for the ornaments leafed on the outside, or the varnish that comes in the kit
- A chopstick or wooden skewer to push the leaf into the ball
- A second soft, dry brush for burnishing
- Glass cleaner and a lint-free cloth
- An egg carton or a row of small cups to stand the clear ornaments upside down while they dry (if you did the inside method), and a wire hanger to hang the colored ones while they dry.
Read next
- Christmas Wall Decor DIY: Lit Greenery Panels for Every Wall
- Pine Cone Fire Starters: DIY for Decor, Gifts, and Wedding Favors
- 30+ Christmas Centerpiece Ideas for the Table, Island, and Coffee Table
- 25+ Christmas Coffee Table Decor Ideas for Every Style
- Winter Wedding Decor Ideas with Vintage Style
Which Glass Ball Ornaments to Use

With clear balls, you can put the silver leaf inside or outside.
Inside. The upside is the leaf won’t flake off, since the glass covers it. There are two downsides. If your ornament has a small neck, it can be hard to get the leaf in. And you won’t be able to control the look. You get what you get.
Outside. For anything opaque, like red, green, white or pink balls, the outside method is the only option. The upside is you can control the look, and the surface is easier to get to. The downside is you’ll need to store them wrapped individually in tissue paper if you want them to last.
If you’re using old ornaments, check the finish first. If the coating is flaking or powdery, the leaf will lift with it. Plastic balls take leaf too, but the sizing may need longer to turn tacky, so test one.
How to Silver Leaf Ornaments
There are two ways to silver leaf ornaments. You can put the leaf on the outside or squirt glue into the ball and drop silver leaf inside the ornament. The inner method only works on clear, or a very translucent tinted ball, or you can’t see it. We suggest anything other than clear use the outer method.

How to silver leaf an ornament on the outside.
Red and green balls are opaque, so the leaf goes on the outside. White, pink black — any opaque ball ornament requires the leaf to go on the outside.
1. Clean the ornaments. Wipe each one with glass cleaner and a lint-free cloth. Sizing won’t grab a greasy surface. Let them dry fully.
2. Apply the sizing. Brush a thin, even coat where you want the leaf. Thick sizing stays wet and the leaf slides. Hang the ornament and wait until the sizing turns clear and tacky, about 30 minutes for the water-based kind. Check your label, since brands vary.
3. Apply the leaf. Lay a sheet of leaf against the ball and press it into the sizing with your fingers or the dry brush. The sheets tear. Use the pieces to patch, or leave the gaps.
4. Burnish and clean up. Rub the dry brush over the leaf to press it down, then brush off the loose flakes. Save the flakes for the inside of the clear ornaments.
5. Let it cure. Leave the ornaments hanging overnight so the sizing sets under the leaf.
6. Seal. Hang the ornaments somewhere ventilated and spray them with a light coat of clear acrylic sealer, or brush on a thin coat of the kit varnish. The spray doesn’t drag across the leaf the way a brush can. Let it dry per the label before you handle them.
These are simple and perfect for a DIY project. You can fill the extras or decorate in other ways!
How to silver leaf inside clear ornaments
You can absolutely do the above method for clear ornaments. But, if you like the idea of a silver leaf look but want a more durable look, this puts the silver leaf inside the glass so no wear or flaking. The trade off is you won’t be able to control the look as much.

1. Take off the cap. Pull the metal cap and wire straight out of the neck and set them aside.
2. Clean the inside if it needs it. If there’s dust inside, swirl in a little rubbing alcohol, pour it out, and let the ball dry with the opening down.
3. Coat the inside. Squeeze a small amount of gloss Mod Podge into the ball, turn it so the glue coats the inside, and pour the extra back into the jar. It looks milky while wet and dries clear.
4. Add the leaf. Tear the leaf into small pieces and push them through the opening with the chopstick while the glue is still wet. Put your thumb over the opening and turn the ball so the pieces land on the walls. Keep adding until you have the coverage you want.
5. Let it dry. Stand the ball upside down in the egg carton so the extra glue drains, and leave it overnight.
6. Put the cap back on. The glass protects the leaf, so there’s no varnish step.
Silver Leaf Ornament Ideas: Coverage and Color

- Full coverage. Patch every gap and burnish hard.
- Partial coverage. One sheet, no patching, so the color shows through the gaps.
- Lower half. Size only the bottom half of the ball and leaf that. This is the look on most of the styled ornaments below.
- Flakes only. Press loose flakes onto sizing, or drop them into a clear ball. This uses up scraps.
Silver goes on red, green, white and pink, and a few gold leaf ornaments mixed into the same bowl add a second metal.
Hang a few on the Christmas tree and put the rest in a bowl nearby. The rest of this post is ten ways to style them.
Ornament Cluster on a Wall Hook

Tie clear ornaments on thin silver cord or fishing line at different lengths and hang them together from one wall hook. A doorknob, a cabinet knob or the end of a curtain rod works too. A strand of fairy lights on a garland above shines through the glass onto the leaf. Clear ones with the leaf inside fit this spot, since people brush past a hook and there’s nothing on the outside to wear off.
Dough Bowl Centerpiece for the Dining Table

Lay greenery along a dough bowl, a long wooden tray or a trencher, and set the ornaments in it with pinecones, eucalyptus and a few sprigs of berries. Mix red, green and clear so two of the same color don’t sit side by side. Brass candlesticks and mercury glass votives on either side carry the metal down the table. Take out the red berries in January and it stays up as a winter centerpiece.
Read next: Christmas Decor Ideas for Every Table
Vintage Ornament Decor for Coffee Table

A dough bowl sits low, so it works on a coffee table without blocking the view across the room. Pack the bottom with greenery and pinecones, then set the ornaments on top with the leafed side facing out. Put it on a holiday table runner and add other decor (or not!).
Entryway Decor Idea: Silver Tray on a Console Table

Pile five or six ornaments on a silver tray with a little greenery underneath and a length of velvet ribbon trailing off one end. On a console under a mirror, the mirror reflects the back of the pile. Add a mercury glass vase of greenery and berries on one side and a votive on the other.
Next: Entryway decor ideas for Christmas
DIY Coffee Table Centerpiece

A glass compote raises the ornaments off the coffee table. Fill it with cedar or fir first so the balls sit up above the rim, then set two more on a stack of books next to it with a loose piece of velvet ribbon. Clear ornaments with the leaf inside show through the sides of the glass bowl.

A white milk glass compote could be stylish with clear or colored balls. These are in our Etsy shop!
Ornaments in Apothecary Jar: Christmas Mantel Decor

Fill a lidded apothecary jar with ornaments, largest at the bottom, and tie a velvet bow around the neck with a sprig of cedar and berries tucked into the knot. On a Christmas mantel, set it next to mercury glass votives and a small lit tree, and leave one ornament on the mantel beside the jar. The jar works on a sideboard or an entry table too.
Silver Pedestal Bowl on a Silver Tray: Small Space Decorating Idea
Although you can use this anywhere, it’s great for a small table or a small hallway because everything is contained on one tray. And, it easily lifts and can be taken elsewhere if the table is needed.

Set a silver pedestal bowl in the middle of a large silver tray. Fill the bowl with ornaments and cedar, then put two or three more on the tray around the base with silver candlesticks, a mercury glass votive and a few berries. Everything sits on the tray, so you can lift the whole arrangement off the table in one piece when you need the space.
Visit our Etsy shop: Shop silver trays

You could also put them in a bowl like this classic Dorothy Thorpe bowl in our Etsy shop: Shop glass bowls
DIY Silver Leaf Ornaments in Glass Cloche with Fairy Lights

Wind a strand of battery fairy lights through greenery on the base of a glass cloche, add clear ornaments, pinecones and a few berry picks, and put the dome over it. The lights shine through the clear glass onto the leaf inside. Battery lights mean no cord coming out from under the dome. Use bleached pinecones for a paler version, and take out the berries to keep it up through winter.
Silver Leaf Ornament Pink Wedding Centerpiece

The outside method works on pink glass balls for a spring or summer wedding. Set five or six on a footed silver gallery tray and fill the gaps with peonies, ranunculus, wax flower and eucalyptus. Glass candlesticks with white tapers go on either side, and a few loose petals on the linen tie the flowers to the table. Shop silver trays.
White and Silver Winter Wedding Centerpiece

For a winter wedding, leaf white glass balls on the outside and mix in a few clear ones with the leaf inside. Set them on a footed silver tray with white ranunculus, spray roses, hellebores and dusty miller between them, and put crystal candlesticks with white tapers around it.
FAQs about Silver Leaf Ornaments
Can you put silver leaf inside clear ornaments? Yes. Coat the inside with a clear-drying glue, push in torn pieces of leaf while it’s wet, and turn the ball so they stick. The glass protects the leaf, so it doesn’t need varnish.
Can I put the leaf inside red or green ornaments? No. Colored balls are opaque, so leaf inside wouldn’t show. Put it on the outside.
Do I need real silver leaf? No. Imitation silver leaf gives the same look on an ornament and costs less. Real silver leaf tarnishes.
What glue do I use inside the ball? Mod Podge or another glue that dries clear. It looks milky while it’s wet.
Can I silver leaf plastic ornaments? Yes, inside or out. Test one first, since sizing may take longer to turn tacky on plastic.
Can I use them for a wedding? Yes. Pick the ball color to match the wedding: pink for spring or summer, white and clear for winter.
How do I store them? Wrap the ones leafed on the outside individually in tissue paper. The varnish protects the leaf, but rubbing between ornaments will wear it. Leaf on the inside is protected by the glass.
Here’s More to Read
- DIY Vintage Christmas Ornaments: Gold Leaf Old Glass Ball Ornaments
- Silver Decor Ideas
- 30+ Christmas Centerpiece Ideas for the Table, Island, and Coffee Table
- 30+ Christmas Table Decor Ideas for Every Room
- Vintage Wedding Decor
Be sure to visit our Etsy shop for more ideas!