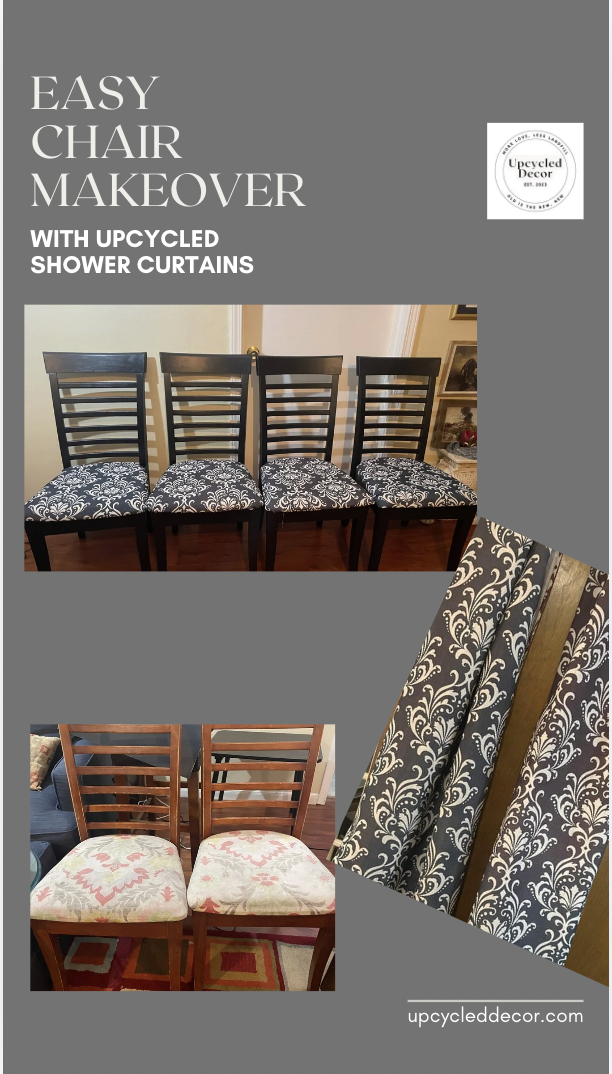
This post is about a quick and easy chair makeover using upcycled shower curtains and paint.
This post may contain affiliate links, which means I’ll receive a commission if you purchase through my link, at no extra cost to you. Please read full disclosure here.
How many times have you driven past a few old wooden chairs on the sidewalk and been tempted to pick them up? Unless of course you’re professional furniture flippers like us. In which case you’ve stopped reading this to get out of the car and grab them. We were on one of our regular curbside find runs (yes, we have a schedule) when we saw six of them! Ok, technically we saw about five and a half. And some legs and seats. And the seats had mismatched fabric. But we saw a fast and easy chair makeover that could turn into a fast flip.
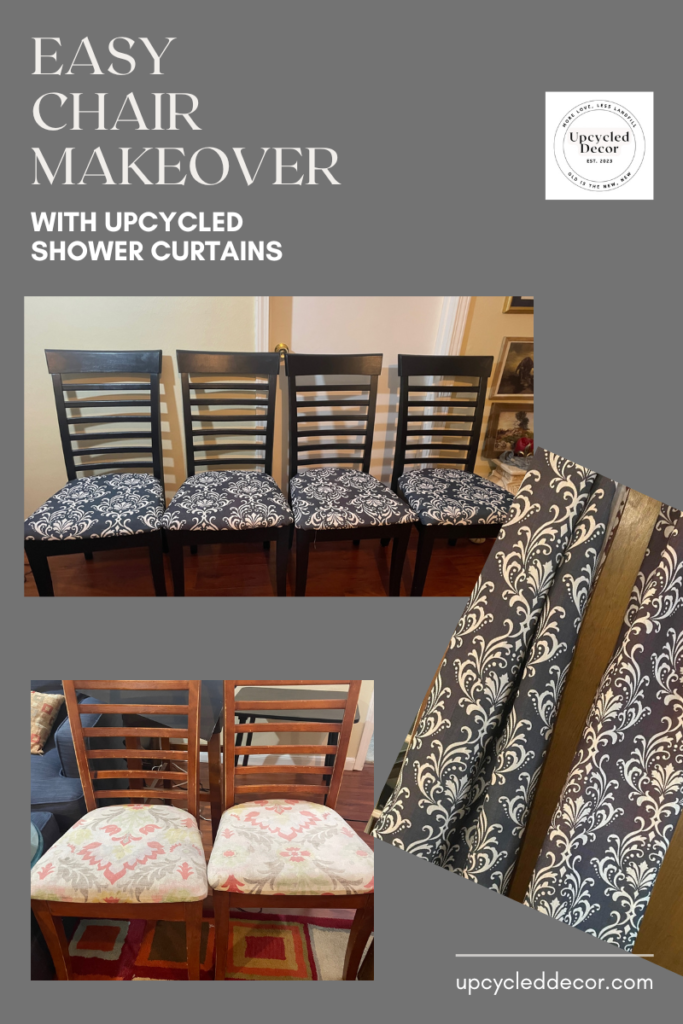
If you are flipping furniture for profit, an easy chair makeover is a great way to make money fast.
Hey, these chairs weren’t much to look at. But, they were free solid wood chairs with fabric seats. And at least four stood upright by themselves. We always take big sets of chairs like this. Whenever we see three or more chairs, we know we can probably get a pair out of them. One becomes “use for parts”: a missing screw, a better leg, whatever. That’s exactly what we did with those curbside find chairs! We took them all apart and put the best legs and best seats together until we had four solid, stable chairs.
Pro tip: A set of four to six matching chairs are great curbside finds for furniture flips.
In general, pairs are always sell better: pairs of lamps, candleholders, end tables, nightstands. And as we said, pairs of chairs do well. But any set of four or more chairs does even better. That includes five chairs! Even though you might think people want an even number, five chairs still sell well. So when you find a set of at least four with potential, pick them up. Read on to learn how to give your curbside chairs a quick furniture makeover for a furniture flip.

We didn’t take a picture of all four chairs. But these were two of the “better” ones when we picked up these curbside finds on our route (yep, we have a route).
1. Take apart chairs, if necessary, and reassemble. You can even mix and match the parts.
Take apart and reassemble chairs as needed. In this case, we set all of the chairs and partial chairs side by side. You literally need to assess which ones have the most potential. You want them to not wobble at all. The chairs need to have no scratches deeper than what can be easily sanded or small (like less than two inches) if they can be easily patched with wood filler. It took us about 90 minutes to disassemble multiple chairs and reassemble into four stable chairs.
2. Super simple sanding for fast furniture flipping (say it three times fast).
We had to lightly sand the wooden legs and backs of all the chairs. But it was truly just a light sand with sandpaper, maybe ten minutes on each. And we used sandpaper, not a power sander. We didn’t have one! We did this project when we were still in our scrappy-use-what-you-got stage. But in this case sandpaper really makes sense.
For one thing, we did it inside and sandpaper was less mess than a power sander. Plus, we were about to use an all-in-one paint, which is primer and paint together (we usually use Behr Primer + Paint in One) No need to sand a ton here—just enough to scuff up the surface for the paint to grip. This saves a lot of time and effort, which is perfect when you want to finish a quick furniture makeover to flip. The less time it takes, the higher your “hourly wage” goes up.

These chairs didn’t require a lot of sanding, but you should smooth out significant scratches.
Pro tip: Sanding furniture before a makeover is underestimated, undervalued and done properly, takes a lot of time. It’s incredibly important to do a really thorough job, get into grooves and detailing, wipe, vacuum, and tack cloth it clean. WHEN you are working on a piece for a full furniture makeover with the results like you see on Instagram. Here, the fact that you only need a light sanding is not a small thing; it is a massive time saver. But this is purely in the spirit of a quick and easy furniture flip to start building a business quickly.
What about chalk paint? You don’t have to sand, right?
Well, usually no. Chalk paint is so thick and forgiving that it is a favorite to skip the sanding. However, for pieces like chairs that get a lot of handling (people are touching it a lot more than, say, an end table), chalk paint absolutely must be properly sealed, so that’s another step. It’s also harder to get a smooth even finish. You’re better off going for a shabby chic look with chalk paint and that look is less popular for simple wooden chairs like this, in our experience. You want to create something universal that appeals to a wide market. These chairs were curbside finds. We wanted to make sure our easy chair makeover was still a profitable one, and sold as quickly as possible.
Materials Needed:
- Four to six chairs, with no cracks, large chips or big scratches
- Fabric shower curtains or other fabric scraps to re-upholster
- Paint (We like Behr Primer + Paint in One)
- Paintbrushes or a paint sprayer
- staple gun
- staple remover
- Screwdriver
- Sandpaper (Don’t go cheap. We tried. Get quality sandpaper to save time.)
3. Painting wooden chairs like these are an easy chair makeover for DIY beginners
Now it’s time for the quick furniture makeover part. We usually flip them over and paint the bottoms first. That’s simply because if we turn the chairs over two quickly, we’re smudging the feet of the chairs. If we were to paint from the top down, and then turn them over too soon, we’d smudge the top of the chair. (We learned this after a hard lesson.) Cover all the wooden surfaces of the chairs. Applying a fresh coat of paint will instantly elevate their look: to be really honest, we’ve stopped after one coat in lucky cases. Let the first coat dry before deciding if they need a second coat for full coverage.
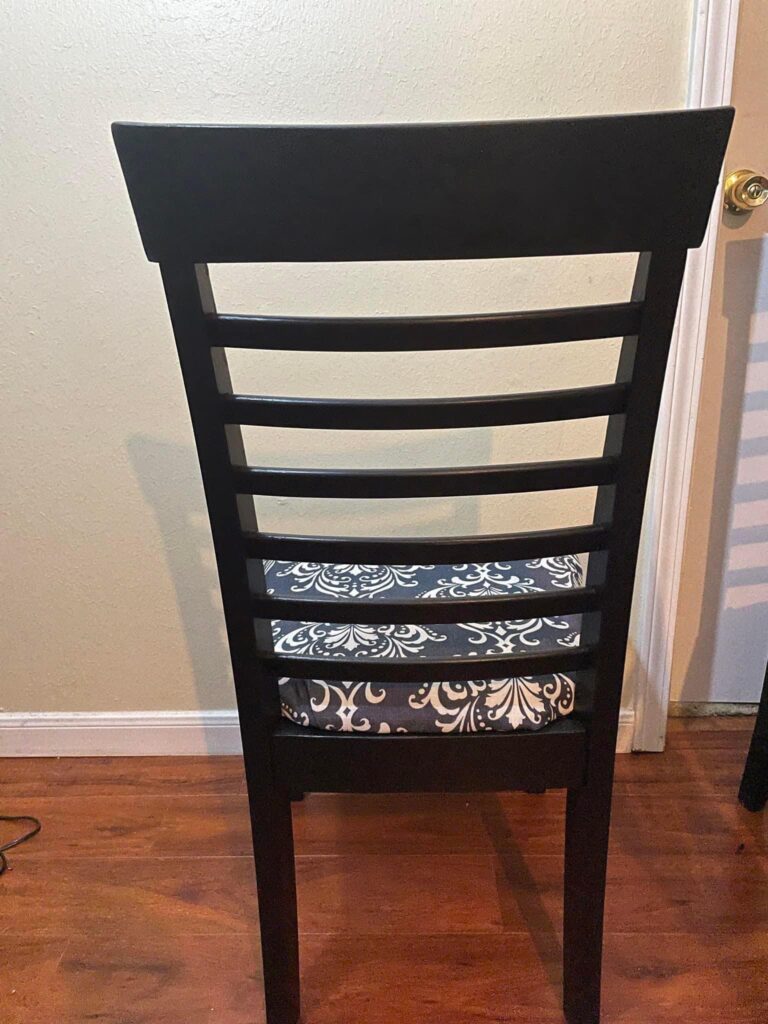
Be sure to get the backs, possibly painting twice. Remember that chairs are usually seen from the back, so unlike most items it’s the most visual part. Look what a difference the paint made! Yet it was an easy chair makeover that took only a few hours.
Pro tip: You can use spray paint—here’s why we wouldn’t.
We recommend brush painting these kinds of wooden chairs, especially if you’re on a budget. If you have more time than money, but not much more (!) these are the perfect quick furniture flip. They don’t take a lot of painting because it’s not a full back and the seat is fabric. But because there isn’t a lot of surface area, you’re going to spray a ton of paint THROUGH the back and the legs. It’s just kind of a waste. If you buy spray paint by the can, you could easily use a full can which is about $8 (you we recommend a paint and primer all-in-one, but otherwise you have to buy a can of primer and a can of topcoat).
What if you have a sprayer?
Well, the cost will be less than spray cans, but personally, we find the prep and the clean up to take more time than painting by brush. We absolutely love our tent, but it does take about 15 minutes to put up and another 15 to take down. Plus you’ll have to clean your sprayer, which takes us another 15-20 minutes. Most importantly, we did this when were still at our scrappy stage. We wrote here about building our furniture flipping business from nothing, and frankly, paint brushes are cheaper than sprayers.
The good news is these kinds of projects are perfect quick and easy chair makeovers for furniture flipping beginners. You can do these for almost nothing—especially if you are using leftover paint, or score an oops can at the store. Even if you have to buy a quart for $15, you should be able to do the whole project for no more than $25. That should you leave you with enough profit to begin to buy things like sanders next time.
Pro tip: one downside of painting by hand, especially if you are a beginner furniture flipper, is that it is not as easy to get a nice even coat. If you can spare another $10-12, we suggest adding a very small amount of Floetrol. Don’t pour into the main can of paint, use a paint cup. We like this one from Handy Paint Cup, but when we started we used red Solo cups. 😀 Pour about a cup of paint, and then about a teaspoon of Floetrol.
While the paint is drying, it’s time to work on the seats.
As obvious as it sounds, you want to be efficient. Paint the chairs first, and then work on the seats while they dry. Then we assessed the seats. The issue was whether the seat cushions were in good shape and the base of the chair itself. We chose the best four and got to work. Remove the fabric, using a staple remover like this one. You should remove at least one of them super carefully, so that you can use it as a pattern. If the cushions are stained or flattened from use, you should replace them. We were lucky in that the cushions were actually in good shape. Only the fabric was really worn.
Upholster chairs with shower curtains (or any upcycled fabric).
We used upcycled shower curtains to reupholster our curbside find chairs. They were $2.99. Why did we buy the shower curtains? Because they were $2.99. Ok, seriously—fabric shower curtains are great to upcycle for upholstering furniture flips. Obviously, get fabric, not the vinyl or plastic waterproofed kind. You can also check out the draperies section. However, we find that curtains at thrift stores sell out more quickly. Maybe it’s because people have more windows than showers? Anyway, thrift store shower curtains are often inexpensive and plentiful and we grab anything in interesting-but-not-too-unique patterns. Sometimes just simple neutrals, although in this case we splashed out for. . .ok, not screaming personality but not neutral.

We upcycled shower curtains from Goodwill to upholster our curbside find chairs. Chairs: $0. Curtains: $2.99. Keep reading to find out how much we sold the chairs for!
You can upcycle almost any fabric to upholster, but patterns will be a little harder than solids.
Use the old upholstery pattern and cut out the shower curtain. A couple of things: patterns like this are tricky if you’re not paying attention. You need to make sure that you are cutting your pattern all in the same direction for all the chairs. In fact, we messed up on these! Keep reading and we’ll point it out later if you don’t spot the mistake. Generally, we suggest choosing fairly neutral colors and patterns, but it’s ok to have fun too. If you are selling upcycled chairs in your furniture flipping business, you want to remember who your target market is, and what they would want to buy. But if it’s for yourself, go nuts. The point of an easy chair makeover is to be able to finish it quickly and be happy with the finished product.
By the way, we always talk about being at the “scrappy” stage versus the “strategy” stage of your furniture flip business. If you need to use regular scissors, take your time. If you plan to do this regularly, buy some fabric scissors. Even an inexpensive pair will make a massive difference.
Pro tip: cut the new fabric a little larger than the original pattern, you can always cut off the extra after you attach it to the seat.
How to upholster for a quick and easy chair makeover
You can now re-upholster the chairs. You may find it easier to have someone hold the fabric while you staple. We’re pretty happy with this staple gun to upholster chairs. If you are on your own, just line the fabric up and start with the front of the seat. Make sure your pattern is centered. Pull that tight and staple across the front of the seat first. That will be most prominent. Then fold at the corners and staple again.

If you look carefully, you’ll see our upholstering job at the back is a little bumpy! But the front is very straight and even. It’s still an easy chair makeover! Learning to do this kind of fast and easy upholstery job with upcycled fabric doesn’t take a long time.
If you are on your own, you might put the seat on the floor, and then use your knee to hold the seat in place. (Hey, you do what you gotta.) Using your staple gun, secure the fabric around the edge of the seat by pulling it tight and stapling all the way around, usually about a half inch from the edge is best.. Wrapping the corners carefully ensures your final piece looks neat and professional. If you cut too much extra fabric and have a lot extending past the staples, trim the rest.
Almost there: Re-attach the seats to the chairs.
Pro tip: You may need a second coat on the chairs. We often have to touch up certain places, as opposed to a true full second coat.
Once the paint is fully dry, you can reattach the seats to the frames. We were really pleased with how these came out. You could also go with white paint and this pattern for a more farmhouse kitchen look. We chose black because:
1) we had some on hand (always keeping costs down), and
2) we thought it would look a little more sleek and dramatic.
Generally, we are big fans of black or white for resale. These are neutral colors that most customers can easily incorporate into their current décor. One note about white: if you’re painting over dark furniture (like turning black furniture white), you may have to use more paint, or the dark color will seep through. Black, while a different aesthetic, covers almost anything.
Flippin’ fast for quicker profits: Curbside chairs and upcycled shower curtains
There you have it—a quick, easy chair makeover for furniture flip success! The black paint gives the chairs a modern feel, while the shower curtain fabric is distinct but not too specific. They manage to still be neutral enough for most décor styles. They sold about two weeks later for $90.
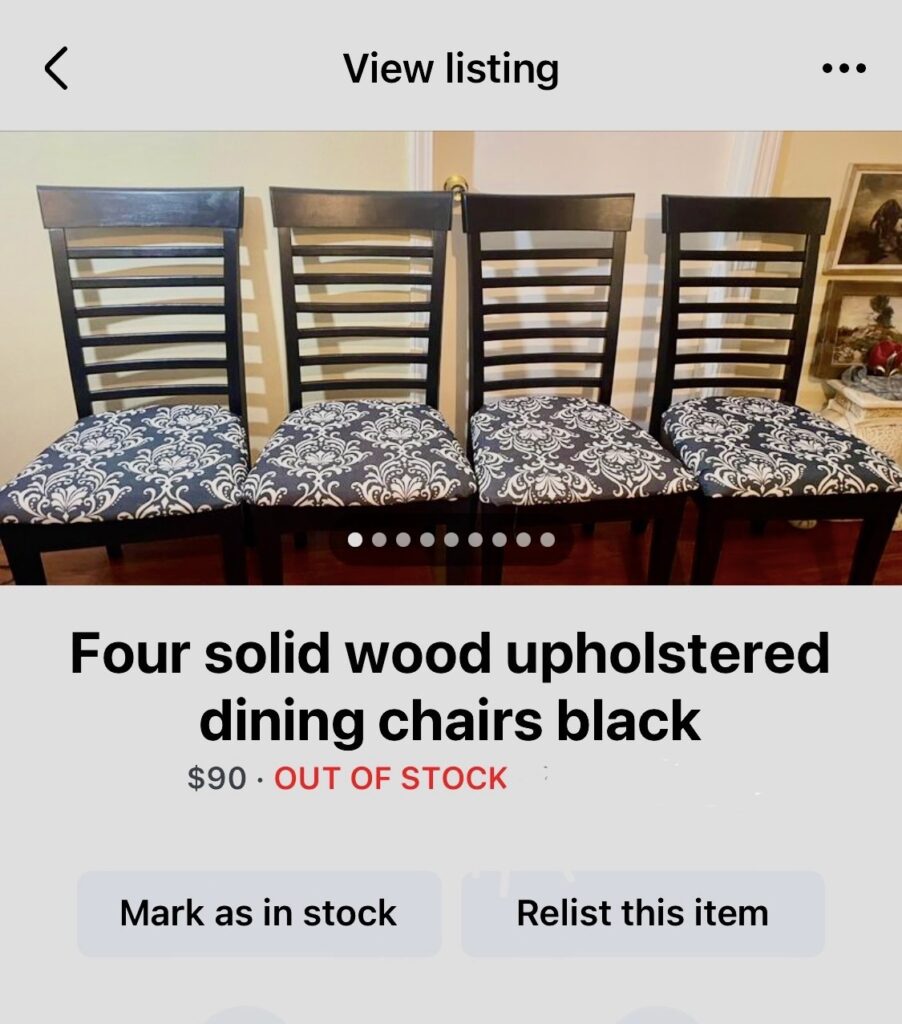
Our final product wasn’t bad, especially since we were beginner flippers. But do you see how the third chair seat is a little different? We cut the pattern upside down! We told you we messed up!
This is such an easy chair makeover that any DIY beginner can get confident with a project like this.
We are such big believers in making more money flipping furniture by making strategic painting decisions. This is a little more involved than some of the “furniture maintenance” rather than furniture makeovers that we’ve done as we scaled. We talk about how we moved from scrappy to strategic as we grew the furniture flipping business to a five-figure income. But in this case it was worth a little more time. All told we probably spent three hours on these, and our profit was about $85 because we already had the paint on hand. That isn’t a great hourly rate, but we were definitely still in our scrappy stage and when you have more time than money. . .you paint more chairs. Best of all, because these chairs were curbside finds, we were able to learn on the job and make money doing it.
This post is about a quick and easy chair makeover using upcycled shower curtain and paint.
If you liked this post please save and share!
